UPDATE
2005:
There's a new version of the
disc
which uses Japanese Nissin hydraulic components or a
cheap upgrade for the old kit.
|
| Pros |
Cons |
| Kit is
complete, castings are good quality and the whole solution
is well engineered |
Can't use wide
wheel rims. You can use semi-wide if you grind off some
metal from the caliper. |
|
Good price |
Supplied hose bulky. Change to Goodridge
900mm (B30900CL) ~£30 No performance improvement, looks
trick. I recommend ScooterLoopy, although other dealers sell
the Goodridge Build-a-line kits. |
|
Great upgrade for shitty Lambretta brakes (even
the original disk brake) |
Handlebar casting holes didn't line up - I've been
assured this is a one-off as all are checked on a jig. |
|
Great customer service and backup from ScootRS |
Brake piston seal leaked - ScootRS exchanged the
entire caliper, still leaks and goes soft after 2 weeks! |
|
Looks factory fitted |
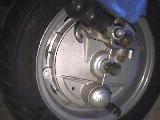
Steel plate that holds caliper to disk seems to be
pissed and hence brake pads wear unevenly |
|
Time
to install - ~ 2 hours, then 1.5 to change the caliper!
|
|
|
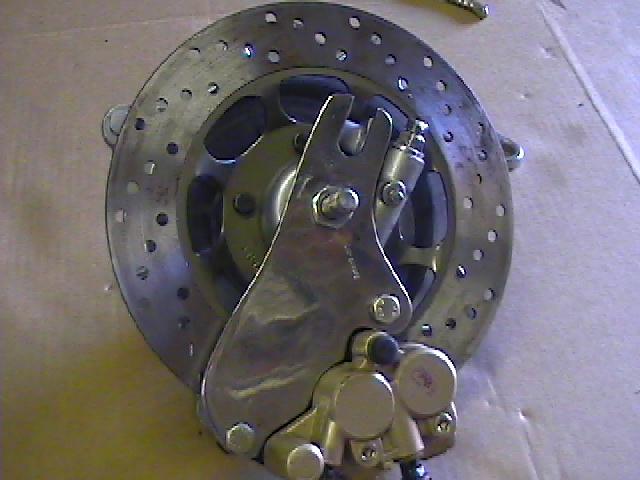
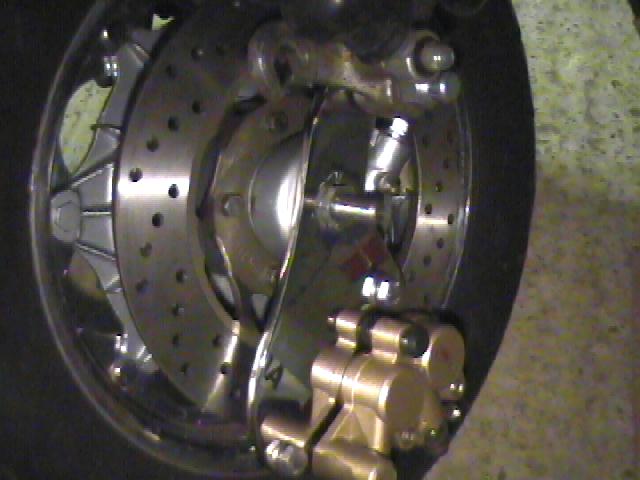
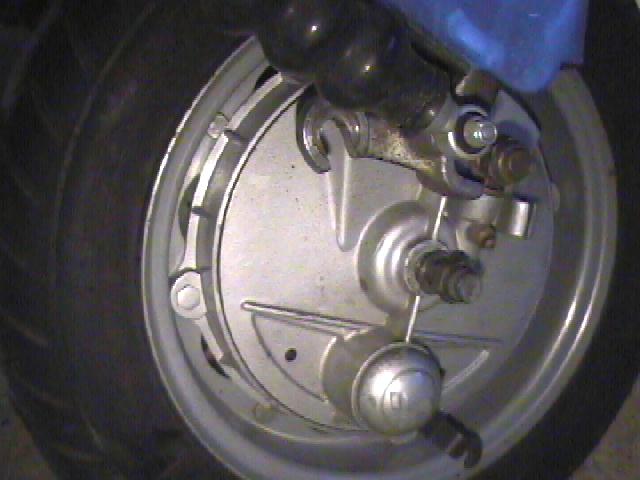
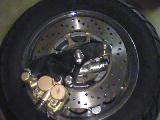
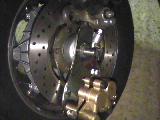
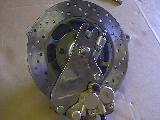 Here's
part of the kit with the hub (innocenti), including the speedometer drive
mechanism, disk and caliper. Here's
part of the kit with the hub (innocenti), including the speedometer drive
mechanism, disk and caliper. |
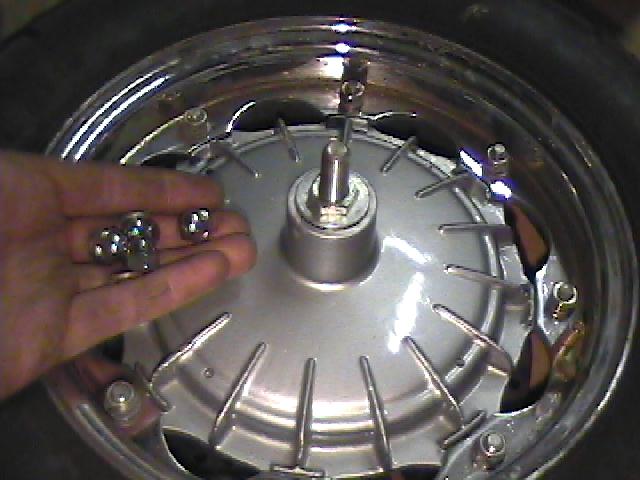
 Another
standard size wheel rim found and fitted. Throw away the hardware supplied and
fit stainless with spring washers. Another
standard size wheel rim found and fitted. Throw away the hardware supplied and
fit stainless with spring washers. |
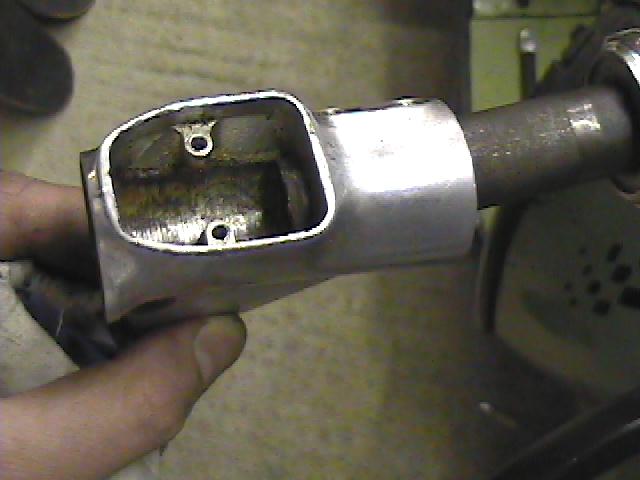
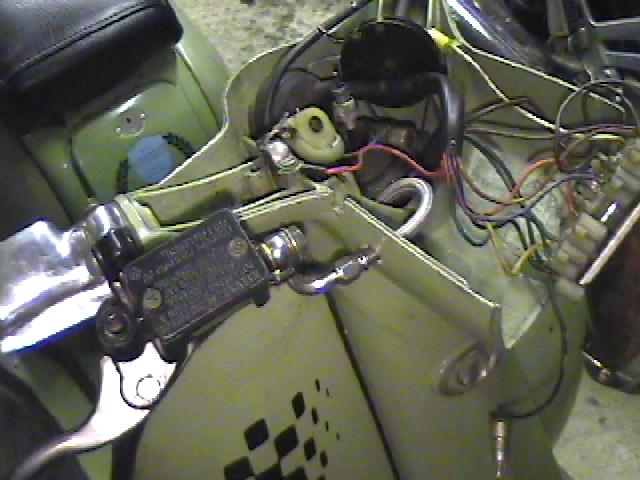
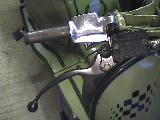
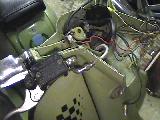
 Remove
the front brake side handle bar grip, front brake lever/cable and the
light/horn switch housing. Remove
the front brake side handle bar grip, front brake lever/cable and the
light/horn switch housing. |
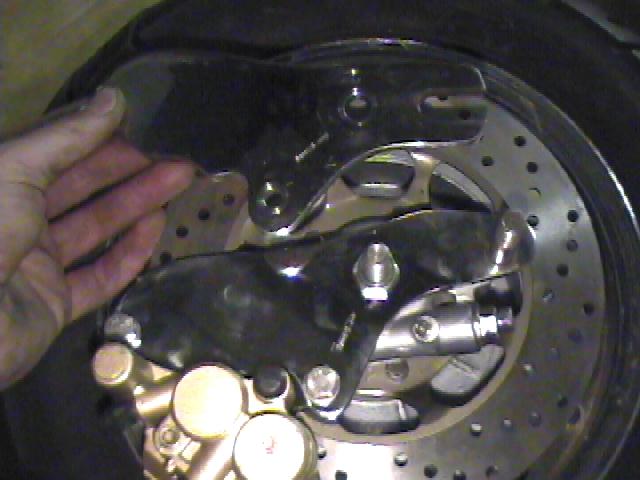
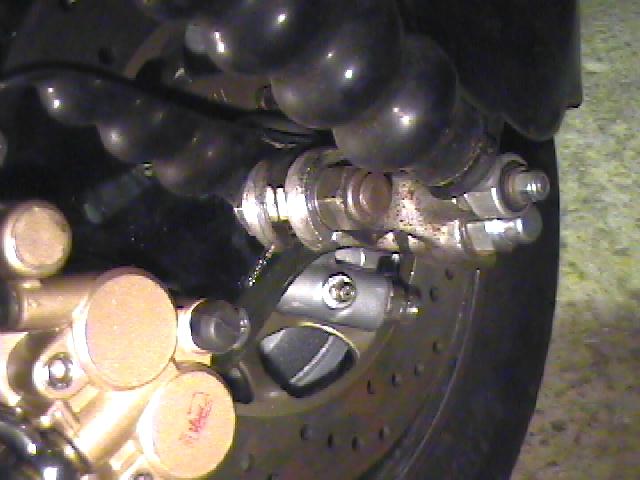
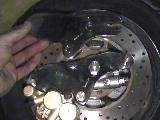
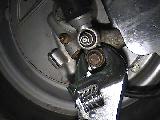
 Note
the plate that holds the caliper in place with the disc. Note
the plate that holds the caliper in place with the disc. |
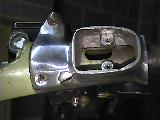
Disconnect the light/horn wires from the headlight and remove the 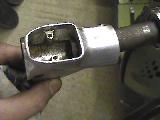 entire
switch. Then take out the 2 screws holding the casing to the handlebar and slide
this off. entire
switch. Then take out the 2 screws holding the casing to the handlebar and slide
this off. |
 Here are two types of plate, one for fork links, the bottom one
(fitted) is for disk links i.e. SX/GP/TV200/TV175. Here are two types of plate, one for fork links, the bottom one
(fitted) is for disk links i.e. SX/GP/TV200/TV175. |
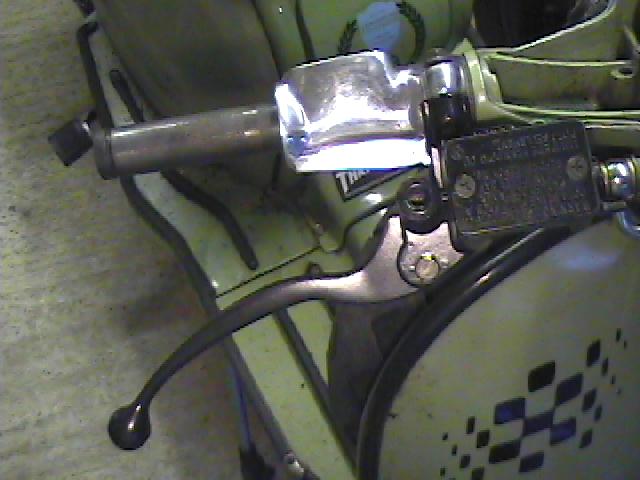
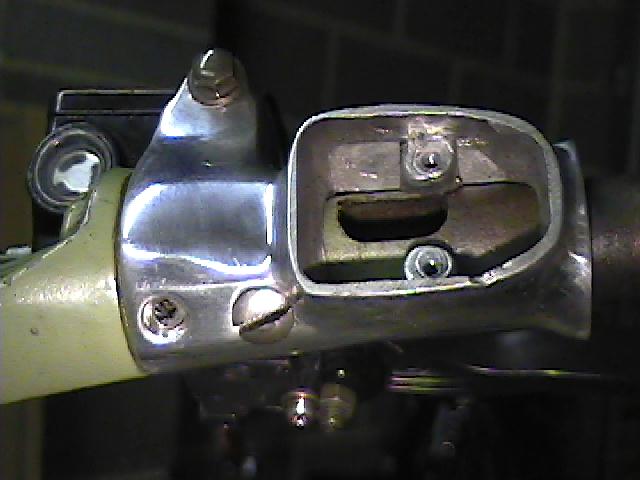
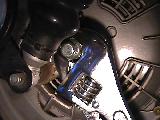
 Now fit the complete
superb replacement casting that houses the brake fluid master cylinder, lovely bit of kit! Now fit the complete
superb replacement casting that houses the brake fluid master cylinder, lovely bit of kit! |
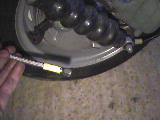
 To
fit the assembled hub offer up the bolt fitted to the plate to the
disk link To
fit the assembled hub offer up the bolt fitted to the plate to the
disk link |
 Shame
the screw holes don't line up though! Shame
the screw holes don't line up though! |
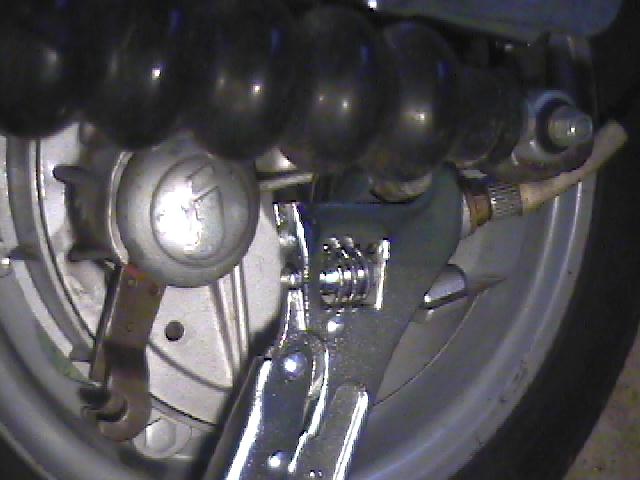
 Slot
in the the axle, fit the washer and bolt and tighten. Mind the grease nipple on
the hub, I smashed mine off during fitting! Slot
in the the axle, fit the washer and bolt and tighten. Mind the grease nipple on
the hub, I smashed mine off during fitting!
|
 Now remove the existing front hub. With disk links remove the main axle nuts first and lift out the washer ... Now remove the existing front hub. With disk links remove the main axle nuts first and lift out the washer ... |
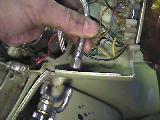
 That's the easy part, back to the headset
feed the hydraulic hose through the horn casting down through the headset and
horn casting to the brake caliper. That's the easy part, back to the headset
feed the hydraulic hose through the horn casting down through the headset and
horn casting to the brake caliper. |
 ...
repeat on the other side. ...
repeat on the other side. |
 Now
line it up in order to drill a hole in the headset base for the hydraulic hose. Now
line it up in order to drill a hole in the headset base for the hydraulic hose. |
 Now
loosen the main nut on the speedo drive side and ... Now
loosen the main nut on the speedo drive side and ... |
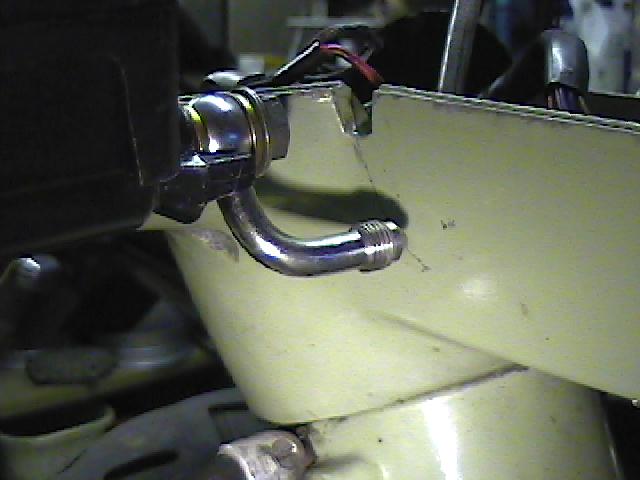
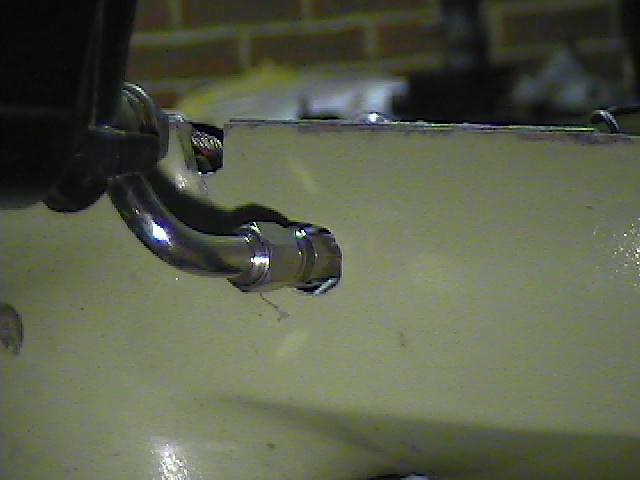
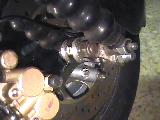
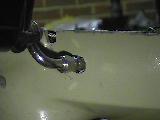
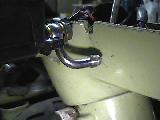 If
using Goodridge hose fit a stainless steel angle connectors
(BK599-03C & BK594-03C needed)* Line this up with where the hose
would naturally go into the headset base. Note the death crack
in my headset coming off of a slot made in the past!
It's better to drill a hole than make a slot, it's stronger
apparently. If
using Goodridge hose fit a stainless steel angle connectors
(BK599-03C & BK594-03C needed)* Line this up with where the hose
would naturally go into the headset base. Note the death crack
in my headset coming off of a slot made in the past!
It's better to drill a hole than make a slot, it's stronger
apparently. |
 ...
the hub should drop down and out. ...
the hub should drop down and out. |
 With
Goodridge hose drill a 13-14mm hole. The supplied rubber hose will
need something much bigger. With
Goodridge hose drill a 13-14mm hole. The supplied rubber hose will
need something much bigger. |
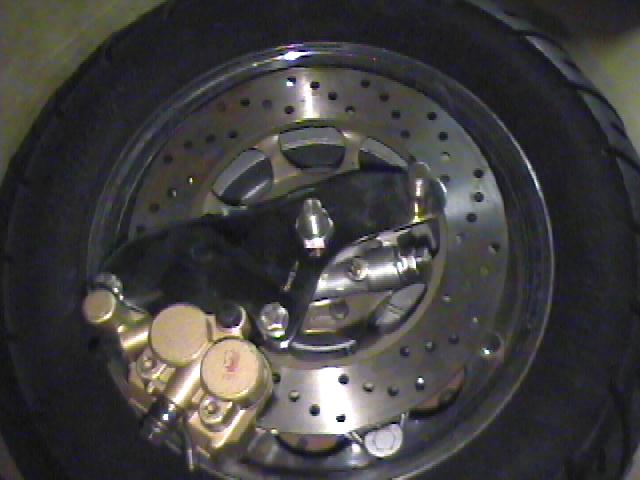
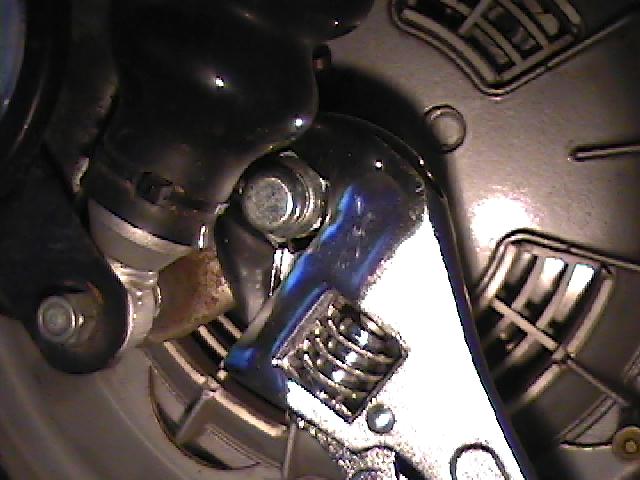
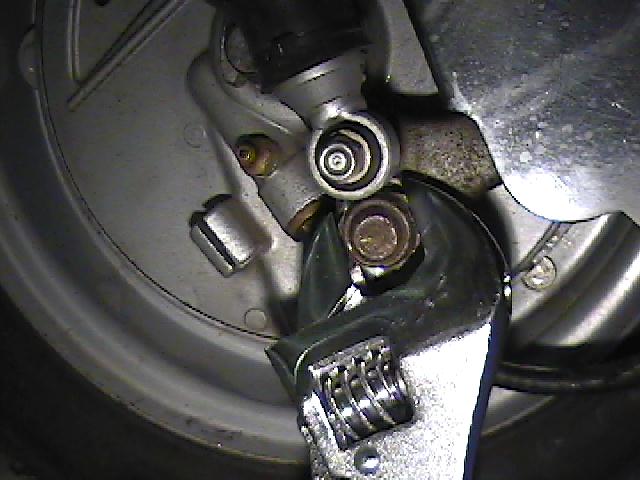
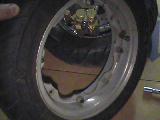 Unfortunately
I found with wide rims that the caliper presses right against the rim and the wheel
won't rotate. Semi wide rims are apparently OK if you grind off some of the
caliper! Unfortunately
I found with wide rims that the caliper presses right against the rim and the wheel
won't rotate. Semi wide rims are apparently OK if you grind off some of the
caliper! |
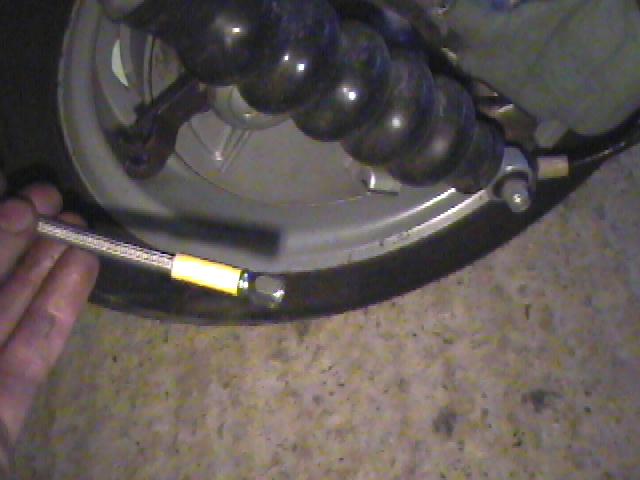
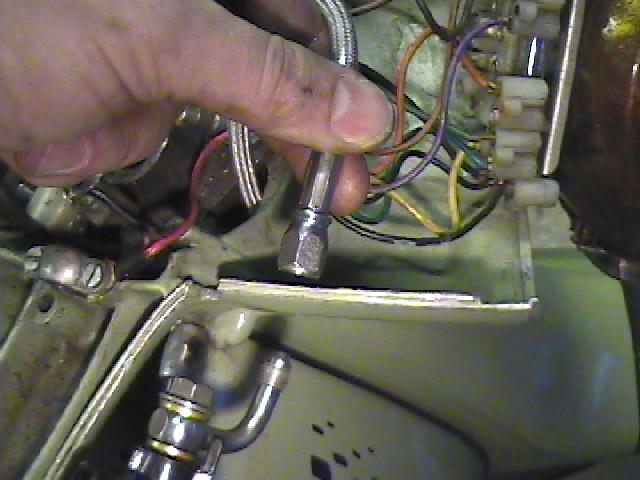
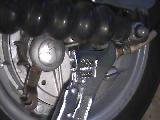
 Thread
the hose through the hole, connect and tighten everything up and fit a rubber
grommet around the hose where it enters the headset base. Thread
the hose through the hole, connect and tighten everything up and fit a rubber
grommet around the hose where it enters the headset base.
|