|
The
toolbox & standard petrol tank (& air filter box if
fitted) are already removed from the
frame. You'll definitely need a hammer or a rubber mallet. Click
on thumbnails for larger images.
| NOTE: Other
Converted dual tanks are available which are effectively 2
tanks welded together. Most of these come from Asia, so when
ordering ensure your let the person your buying them from
what type of manifold and carb you have fitted i.e. std. TS1
manifold, MB (shorter style), Imola etc. |
| PRODUCT
REVIEW - OVERALL 6/10 |
| Pros |
Cons |
| This steel tank is well designed &
strongly constructed. A
lot of work is involved in their
fabrication. |
Needs cleaning internally,
lining with a tank repair kit (£30) &
painting. |
| The price of £120 + £10 P&P
was a good deal, considering above (2000 price) |
One of the hardest things I've
ever had to fit to a Lambretta. A LOT of hassle with no
instructions.
|
|
No fitting kit (2 x M8 x 10 + 2 x
M8x5 stainless bolts
required + plus rubber washers). Time to install - took me at least
4 hours!
|
|
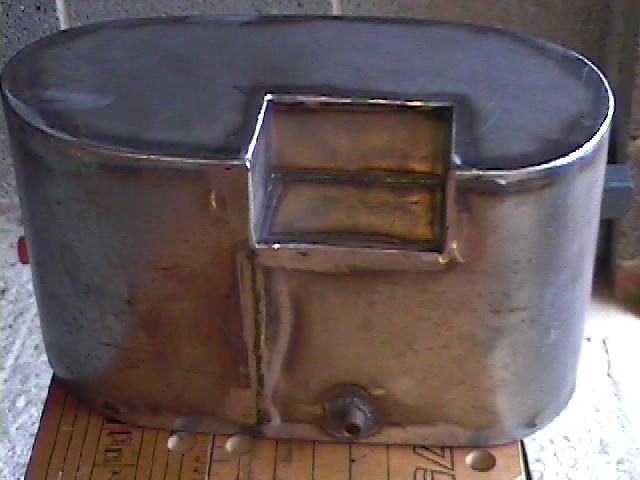
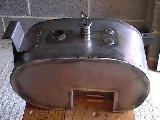
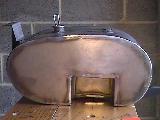 1.
The tanks come with either side (or both) cut out to accommodate
different carb
configurations i.e. standard, TS1, Imola etc. The front of the
tank is to the right. 1.
The tanks come with either side (or both) cut out to accommodate
different carb
configurations i.e. standard, TS1, Imola etc. The front of the
tank is to the right. |
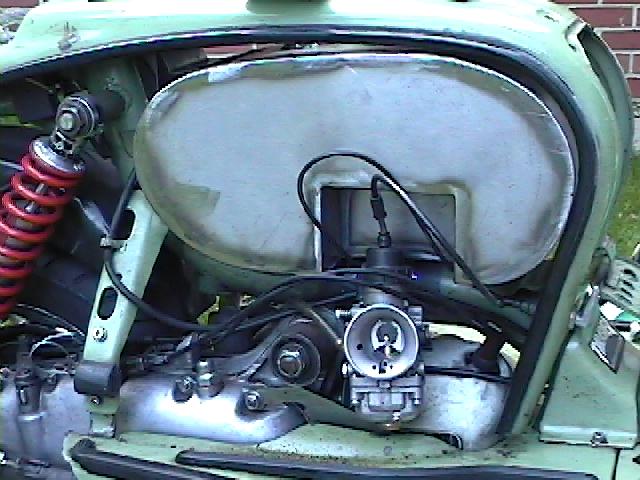
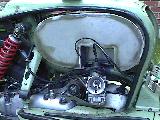 7. The
fuel tank occupies just about as much space as is possible in the
frame. Take care to route the throttle & choke cable (not like
shown) 7. The
fuel tank occupies just about as much space as is possible in the
frame. Take care to route the throttle & choke cable (not like
shown) |
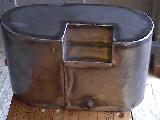 2.
Here you see the cut out for a TS1 carb mounting & the
petrol tap. See pic.11 for the improved petrol tap location. 2.
Here you see the cut out for a TS1 carb mounting & the
petrol tap. See pic.11 for the improved petrol tap location.
|
 8. Now
carefully tighten 2 x M10 stainless steel bolts (not supplied)
through the seat bracket into the tank. 8. Now
carefully tighten 2 x M10 stainless steel bolts (not supplied)
through the seat bracket into the tank. |
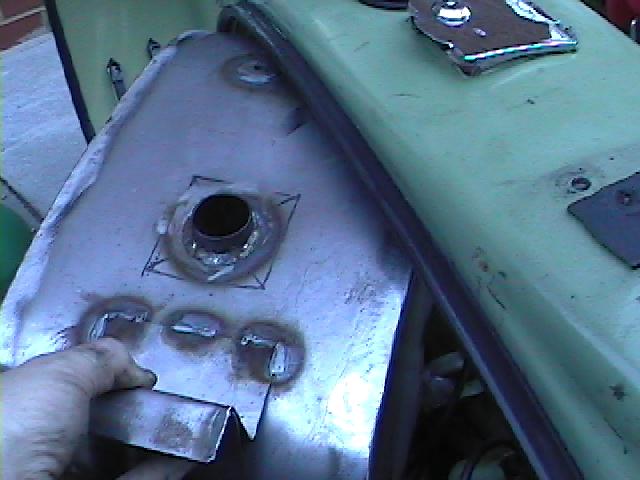
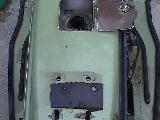
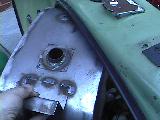
 3.
Here you can see the two holes that the front seat bolts through the
frame into. The back bracket needs drilling. Fuel filler cap is
shown in this pic. 3.
Here you can see the two holes that the front seat bolts through the
frame into. The back bracket needs drilling. Fuel filler cap is
shown in this pic. |
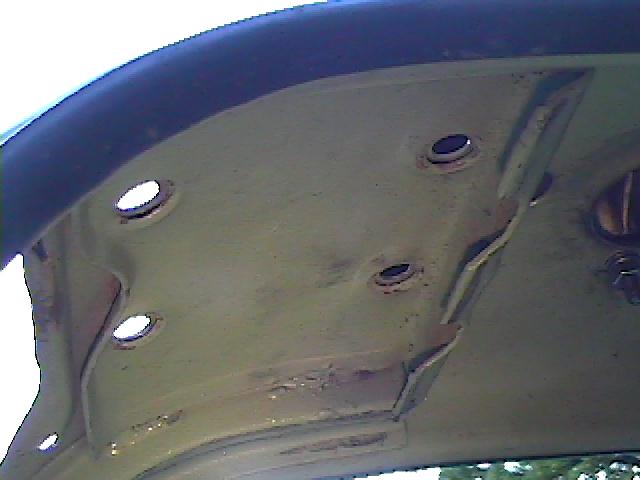
 9. Looking
up into the back of the frame shows that the rear tank bracket needs
to be bent up towards the rear seat holes. 9. Looking
up into the back of the frame shows that the rear tank bracket needs
to be bent up towards the rear seat holes. |
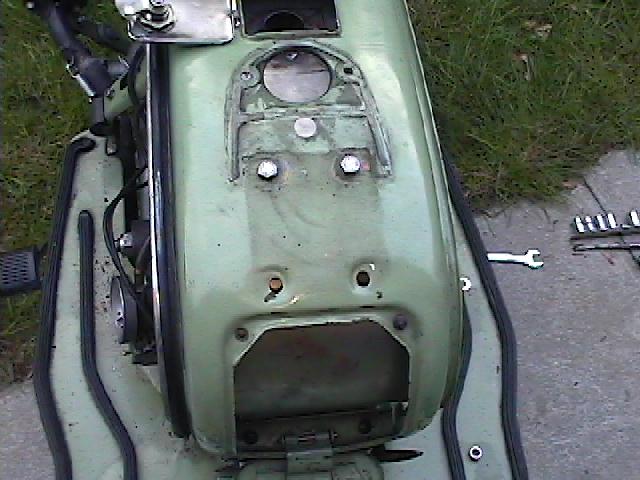
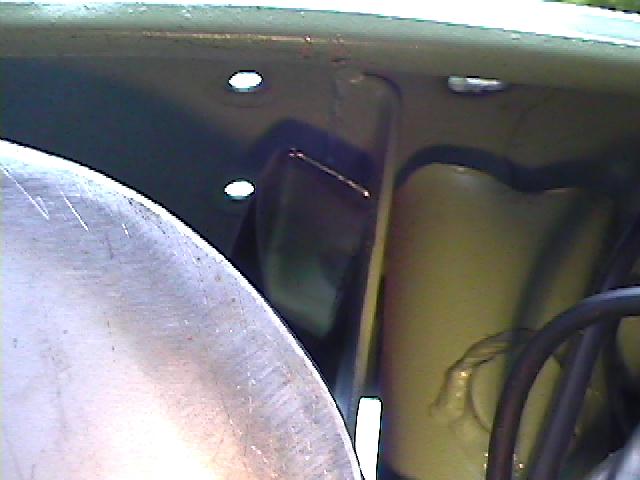
 4.
Standard petrol tank & toolbox removed. Side panel trim is also
removed to provide additional clearance when fitting the tank. 4.
Standard petrol tank & toolbox removed. Side panel trim is also
removed to provide additional clearance when fitting the tank. |
 10. Through
the seat bracket holes is the tank rear bracket. Leave a 20-25mm gap
for rubber or nylon washers (not supplied) & mark. Remove tank
to drill the required holes. 10. Through
the seat bracket holes is the tank rear bracket. Leave a 20-25mm gap
for rubber or nylon washers (not supplied) & mark. Remove tank
to drill the required holes. |
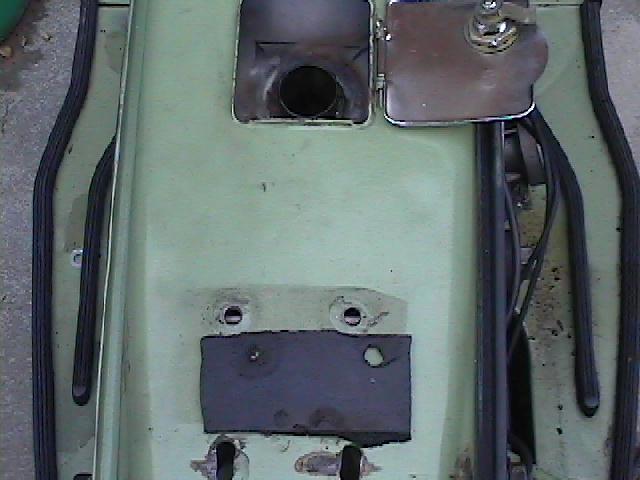
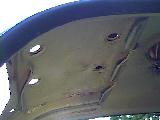 5.
Where the tool box was the flanges to the right of the picture
need "flattening" off with a suitable tool (mallet) This
stops them interfering with the tank mounting. 5.
Where the tool box was the flanges to the right of the picture
need "flattening" off with a suitable tool (mallet) This
stops them interfering with the tank mounting.
|
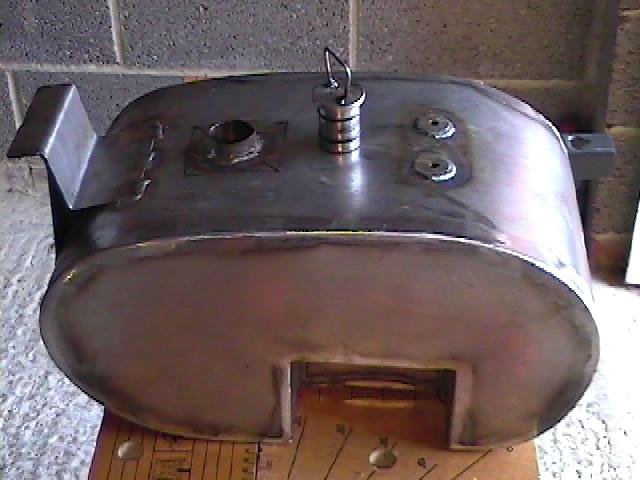
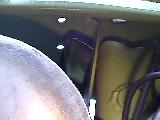
 11. The
petrol tap on these tanks has been moved forward approx 10cm. This
leaves more clearance, rather than having the tap & pipe up
against the engine mount. 11. The
petrol tap on these tanks has been moved forward approx 10cm. This
leaves more clearance, rather than having the tap & pipe up
against the engine mount. |
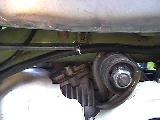
 6.
Slide the tank in from the left hand side (when sitting on
scooter) The existing frame petrol tank support may also need
"flattening" with your trusty rubber mallet. The rear bracket on mine needing some persuading! 6.
Slide the tank in from the left hand side (when sitting on
scooter) The existing frame petrol tank support may also need
"flattening" with your trusty rubber mallet. The rear bracket on mine needing some persuading! |
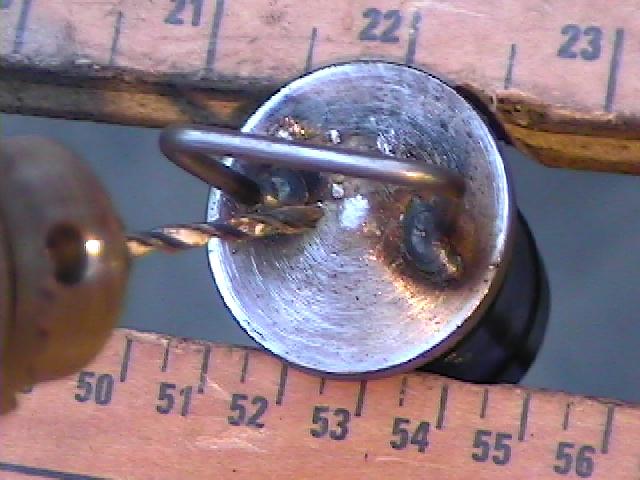
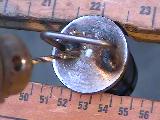 12. Now
need to paint, clean & line the tank. Also drill a 2mm hole in the filler cap to release back
pressure, otherwise the fast flow
tap won't shift 1 pint every 50 seconds. 12. Now
need to paint, clean & line the tank. Also drill a 2mm hole in the filler cap to release back
pressure, otherwise the fast flow
tap won't shift 1 pint every 50 seconds. |